First note to self: when deciding on a delicious recipe to cook for dinner get all the ingredients out before you start cooking so you don't realise half way through you actually don't have all the things you thought you had.
Second note to self: Make sure you have got yourself a towel out BEFORE you get in the bath/shower.
Third note to self: Do not trust your small children to go in the lounge (with the newly cleaned carpet) with bottles of Vimto, it doesn't smell half as appealing when its soaking slowly in and your scrubbing like mad with stain remover.
Final note to self: Don't ever replace batteries in the annoying hairbrush that plays random Rapunzel song over and over and over and over and over and over!
aaaaaand breathe, drink diet coke, relax! (but do NOT touch chocolate you are being good!!!)

A collective of my thoughts and ideas from random lifestyle queries to crafty goodness. Including my latest projects and some tutorials on crafting etc. I hope you enjoy and imput (constructively) also visit my Facebook, Twitter and Pinterest. Au Revoir x
Friday, 24 February 2012
Tuesday, 21 February 2012
The wheel is slowly turning....
Its that time of the week again when I ramble on my blog, its also pancake day what a Brucie bonus, unfortunately we decided to test our pancake making skills last night and I think I overdid it on the banana pancakes and nutella (bloody good though) so may give them a miss tonight!
I thought I had finally finished my daughters bunk bed curtain so I hung it up and realised half of it looked totally empty so not wanting to be half a job Bob I took it down and now need to fill the mass of empty space. By the way those of you thinking this may turn out to be some major work of crafting magic.........DON'T you will be hugely disappointed, its only taken so long because its one of those jobs that's always being passed over for something else. Hopefully one day very soon though I will finish it, be proud and feel a crafty weight lifted from my shoulders, having said that my most demanding customer and critic (my 4yr old) has put in specific orders for seat cushions and giant floor cushions so be prepared for more of my everlasting projects!
Fast Forward............
I wrote the latter this morning to finish this evening and in that space of time I have SURPASSED MYSELF COMPLETELY!!!!
The said seat cushions that my daughter demanded of me are finished, I actually stopped thinking about what to do and just did it for a change and I managed to make a pair of cushions from start to finish in about an hour!!! (for me this is astounding)

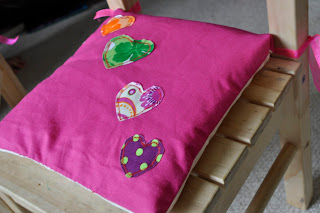
I was so proud I had to take pictures on my phone and show a (completely bewildered) friend. But don't look too closely the applique is fairly squiffy I made my first attempt at machine applique ...... and hats off to you crafters it will definitely need practise!
well that turned into a monster blog apologies.
Lesson of the week - stop thinking so much about it JUST DO IT!!
p.s do not follow that advice if what your thinking about is dumb or illegal my blogs do not stand up in court as self defence.
Tuesday, 14 February 2012
The cheesiest post your likely ever to see on my blog!
Valentines isn't really my cup of tea these days my husband and I have always given cards and that's about the extent of it. I hate to sound like an old biddy but I like to think meals out and little love tokens should be a fairly regular occurrence not a Valentines, anniversary and birthday treat. I can by no means afford to be dining out every week (nor could I get the babysitters) but I want to go out because we want to not because that's what people do on valentines.
Having said that its also not really about the meals out and gifts its the things that cost nothing which mean the most, anyone can take someone to a restaurant or buy some earrings but if you can't hold hands in public and be proud to love someone then whats the point?
Now that we have children something as simple as spending time together in the evening is appreciated whether its curling up together to watch Tudors (totally addicted) or eating a late tea on our own.

Remember love costs nothing a little note left on a pillow (please get milk doesn't count I'm afraid), a kiss given for no reason at all or telling someone their amazing is one of the best gifts you can give when your truly in love!
Though if you are not as cynical as me and your being taken out and spoilt have a truly wonderful time!
Tuesday, 7 February 2012
Envelope cushion cover tutorial
I said on my facebook page about a million weeks ago that I would be putting a cushion tutorial on here and FINALLY here it is.
Obviously I meant to keep you waiting to build up your excitement (I made cushion and forgot to take photo's of the stages) but now I think you've waited long enough.
My cover was for a cushion insert that was 18x18 inches but I've tried to explain so you can easily adapt to fit whichever size you need, the measurements include your seam allowance!
Lets go....
You will need:
Fabric (I used different for front and back)
Sewing machine
Thread
Pins
Scissors or rotary cutter and Matt
A cushion insert
I like to use separate fabric for the front because you can get awesome panels or fat quarters and use them.
The front piece needs to be 1 inch bigger than your cushion all round so for my 18"x 18" cushion my fabric needs to be 19"x 19" (you want the fabric to be snug round the pillow/cushion but not so tight its half bursting out).
For the back piece you want the width to be an inch bigger than the cushion as before but you want to add 5 inches to the length, so for my cushion the back piece will be 19"x 23".

Take your BACK piece, find the middle and cut in half!

OK now we want to hem one long side on each of these, this will be the opening on the back.
Fold about a quarter of an inch over and press, then fold over again, press, pin and sew!

Take your FRONT piece and lie down right side facing UP then line up your BACK pieces on top right sides facing DOWN overlapping your hems.


Pin these all the way around and sew, you don't need to leave an opening because you already have a great big one on the back! (don't forget to trim your corners so they turn out nicely).

Now simply turn the right way out and pop your cushion in! BA DA BING!!


I hope you found that helpful and easy to follow, I'd love your constructive feedback and if you would like one made just ask, Ciao for now x
Thursday, 2 February 2012
Mini gift bag tutorial
Well howdy as promised this is a little tutorial for a mini bag which can be used for small gifts, Vouchers or for kids to have.
You will need:
fabric scrap
ribbon
4 small buttons
needle and thread
scissors

OK.........
Cut your fabric piece its just a rectangle about 11" x 5" (27 1/2cm x 12 1/2cm)
this includes your seam allowance.
Fold a half inch (about 1cm) over so wrong sides are touching at each short end, press and then sew.


Repeat this for all the ribbon ends and VOILA gift bag complete. The great thing about these is you can easily hand sew the whole thing and its just in time for valentines and mothers day!

You will need:
fabric scrap
ribbon
4 small buttons
needle and thread
scissors

OK.........
Cut your fabric piece its just a rectangle about 11" x 5" (27 1/2cm x 12 1/2cm)
this includes your seam allowance.
Fold a half inch (about 1cm) over so wrong sides are touching at each short end, press and then sew.

Now fold the fabric in half so right sides are touching then sew down each of the longer sides and trim the bottom corners and turn the right way out.

That is the main part of the bag done. For the handles, cut 2 strips of ribbon to the size you want your handles to be, you can have the ends of the ribbon on the inside or outside of your bag (different colours and patterns look better in different ways) in this case I've opted to put the ends on the out side. simply sew each end in place with a button, its strong enough as there won't be anything hugely heavy inside.

Repeat this for all the ribbon ends and VOILA gift bag complete. The great thing about these is you can easily hand sew the whole thing and its just in time for valentines and mothers day!

Don't have time to make one? buy one I'll be putting them on my folksy shop or you can message me on my facebook page. www.folksy.com/shops/rustickitsch
Subscribe to:
Posts (Atom)